
Land (37)
- 1x Ancient Tomb
- 1x Arid Mesa
- 1x Bloodstained Mire
- 1x Bojuka Bog
- 1x Breeding Pool
- 1x Brushland
- 1x Caves of Koilos
- 1x Cephalid Coliseum
- 1x City of Brass
- 1x Command Tower
- 1x Exotic Orchard
- 1x Flooded Strand
- 1x Forbidden Orchard
- 3x Forest
- 1x Gaea's Cradle
- 1x Godless Shrine
- 1x Hallowed Fountain
- 1x High Market
- 1x Llanowar Wastes
- 1x Mana Confluence
- 1x Marsh Flats
- 1x Misty Rainforest
- 1x Overgrown Tomb
- 1x Plains
- 1x Polluted Delta
- 1x Reflecting Pool
- 1x Stomping Ground
- 1x Swamp
- 1x Tarnished Citadel
- 1x Temple Garden
- 1x Urborg, Tomb of Yawgmoth
- 1x Verdant Catacombs
- 1x Watery Grave
- 1x Windswept Heath
- 1x Wooded Foothills
Tutor (17)
- 1x Academy Rector
- 1x Birthing Pod
- 1x Bring to Light
- 1x Demonic Tutor
- 1x Dimir House Guard
- 1x Eladamri's Call
- 1x Enlightened Tutor
- 1x Fauna Shaman
- 1x Green Sun's Zenith
- 1x Heliod's Pilgrim
- 1x Jarad's Orders
- 1x Praetor's Grasp
- 1x Shred Memory
- 1x Sidisi, Undead Vizier
- 1x Vampiric Tutor
- 1x Wild Pair
- 1x Worldly Tutor
Interaction (14)
- 1x Acidic Slime
- 1x Anafenza, the Foremost
- 1x Bojuka Bog
- 1x Eidolon of Rhetoric
- 1x Fiend Hunter
- 1x Harmonic Sliver
- 1x Mindslicer
- 1x Peacekeeper
- 1x Reflector Mage
- 1x Shriekmaw
- 1x Sire Of Insanity
- 1x Song of the Dryads
- 1x Spirit of the Labyrinth
Utility (9)
Commander (1)
Combo (16)
- 1x Academy Rector
- 1x Altar of Dementia
- 1x Animate Dead
- 1x Body Double
- 1x Boonweaver Giant
- 1x Carrion Feeder
- 1x Dimir House Guard
- 1x Fiend Hunter
- 1x Goblin Bombardment
- 1x Karmic Guide
- 1x Pattern of Rebirth
- 1x Phantasmal Image
- 1x Reveillark
- 1x Saffi Eriksdotter
- 1x Sun Titan
- 1x Viscera Seer
Fixing/Ramp (12)
Maybeboard
Other (43)
- 1x Beast Within
- 1x Blasting Station
- 1x Blood Artist
- 1x Bloom Tender
- 1x Bone Shredder
- 1x Buried Alive
- 1x Carpet of Flowers
- 1x Cartel Aristocrat
- 1x Chromatic Lantern
- 1x Coalition Relic
- 1x Collective Restraint
- 1x Crypt Champion
- 1x Dack's Duplicate
- 1x Dance of the Dead
- 1x Deathrite Shaman
- 1x Eldritch Evolution
- 1x Elesh Norn, Grand Cenobite
- 1x Entomb
- 1x False Prophet
- 1x Gift of Immortality
- 1x Glen Elendra Archmage
- 1x Hushwing Gryff
- 1x Intuition
- 1x Lotus Cobra
- 1x Loyal Retainers
- 1x Necromancy
- 1x Painful Truths
- 1x Path to Exile
- 1x Pernicious Deed
- 1x Phyrexian Metamorph
- 1x Phyrexian Tower
- 1x Priest of Titania
- 1x Reanimate
- 1x Reclamation Sage
- 1x Recruiter of the Guard
- 1x Renegade Rallier
- 1x Rune-Scarred Demon
- 1x Sensei's Divining Top
- 1x Skullclamp
- 1x Survival of the Fittest
- 1x Swan Song
- 1x Wargate
- 1x Weathered Wayfarer

Introduction
This is a five colored combo EDH deck built around Pattern of Rebirth and Reveillark. It is designed to be played in competitive multiplayer rounds.
A large part of this deck are combo relevant creatures and tutor effects that help to assemble these creatures in the right constellation as quickly as possible. Meanwhile, a selection of disruptive creatures complicates life for the opposition.

+ The deck is flexible and resilient. It can disrupt your opponents' gameplan and win through disruption itself. Lots of tutor effects give you plenty of options at each stage of the game.
+ A five color deck gets to choose from the best cards. The general card quality of the deck is very high and most of the combo pieces are useful outside of the combo.
+ Another advantage of the five color deck is the surprise factor. The vastness of possibilities available to your deck will keep the opponents guessing, whereas commanders like Brago, King Eternal are much more predictable.
+ Being a combo deck, sometimes you can just ignore what the rest of the table is doing and kill them out of nowhere. Also, the constant threat of you going into one of multiple possible combos might force your opponents to play suboptimally.
+ The core of the deck is very powerful and a lot of adjustments can be made around it. It can be very well tuned to match any given metagame or preference. Even switching to an -colored commander like Karador, Ghost Chieftain or Anafenza, the Foremost or a commander like Saffi Eriksdotter are possible alternatives.
+ The deck is challenging to play (which i personally think of as a mostly positive feature) and rewards good decisions. It feels great to see how a plan you developed several turns ago works out perfectly and wins you the game. Cards like Birthing Pod and Wild Pair force you to think a lot, and that's something i enjoy when playing MtG.

- Piloting this deck is not always easy. Sometimes you start the game with multiple fetchlands plus several narrow tutors like Shred Memory and only detailed knowledge of the whole decklist can help you figure out the best line of play.
- This deck is a work in progress and still far from reaching its final shape. If your goal is to play the most powerful competitive deck, this is unlikely to be the one you are looking for. It is however built with a competitive mindset and definitely able to hold it's ground in a semi-competitive playgroup.
- Winning with this deck requires comboing. It's theoretically possible to win without going infinite, but if that's what you enjoy most, this deck isn't for you. If a combo kill on turn 4 or 5 is breaking the social contract of your playgroup, you probably want to stay away from this deck.
- This deck isn't budget friendly, even without powerhouses like Imperial Recruiter, Mana Crypt and the original dual lands. Unfortunately, many of the expensive cards are expensive for a reason: They do something very unique and powerful and can't easily be replaced by cheaper options.
- The mana will sometimes cause you to lose games. I've been working on this decklist for quite some time now and i think i made a lot of progress on the mana base (mostly by reducing the number of greedy colored mana symbols on my spells and focusing on three base colors). Nevertheless, every once in a while you will find yourself unable to cast some of your spells, especially if your opponents interact with your mana in the early turns.
- If the whole table wants to disrupt you, they will be able do that. This deck isn't lightning fast, and all kinds of disruption can interfere with your combo. My build doesn't offer a lot of great ways to recover from bad situations, but can at least bounce back from some amount of hate.
General Strategy
There is three ways to do this:
1) Put Boonweaver Giant into play, usually from the grave by means of Animate Dead or Karmic Guide, but sometimes you can also just hardcast it. The Giant's trigger then simply grabs Pattern of Rebirth and off we go.
2) If you happen to draw Pattern of Rebirth, enchant a random creature with it, then sacrifice that guy and tutor up Boonweaver Giant. He then uses his trigger to enchant itself with Pattern of Rebirth from the graveyard.
3) Getting a specific medium costed creature into play is what this deck does best, because of the restrictions of tutors like Bring to Light, Eladamri's Call or Birthing Pod . That's why the most common way to start into the combo is using Academy Rector . Just sacrifice that lovely old lady and put Pattern of Rebirth into play, enchanting a random creature, and proceed as above.

Let's walk through how this works exactly:
You start by sacrificing the Giant to trigger Pattern and grab preferably Karmic Guide, otherwise Body Double, or Sun Titan if Animate Dead is in your graveyard. Each of them is able to reanimate or copy the Giant, thus returning Pattern to repeat the process (sac it, search for a creature). Now you have several possible creatures to tutor up: Either another one of the aforementioned three, Saffi Eriksdotter , Fiend Hunter, Phantasmal Image or Reveillark. Any of them pairs with Karmic Guide (and some with Body Double or Sun Titan) to form a loop of returning eachother from the grave, which allows for infinite activations of Altar of Dementia or Goblin Bombardment. So, if you have one of those two in play, you can just win the game right now.
If you don't or the kill might not work for some reason (Ulamog, the Infinite Gyre that prevents decking, Aegis of the Gods that prevents targetting, Platinum Angel plus Darksteel Forge, etc), you have to go the Reveillark route. Here, you assemble Reveillark plus two of the creatures mentioned above (Sun Titan excluded) by repeatedly using Boonweaver Giant. So for example, you tutor for Karmic Guide first, return Boonweaver, then tutor for Saffi Eriksdotter , sac that to its own ability to get another Karmic Guide trigger, return Boonweaver, finally putting Reveillark into play. Now when you sacrifice that, you can return both Karmic Guide AND Saffi Eriksdotter to play. Which means two Karmic Guide triggers, returning both Reveillark and either Boonweaver Giant or another useful creature from the grave. Now you can get any number of creatures from your deck and graveyard into play, and sacrifice and return them as many times as you wish.
What to do with this much power? Acidic Slime, Fiend Hunter plus Mindslicer can leave the opponents completely helpless. If you need Goblin Bombardment or Altar of Dementia, tutor them with Sidisi, Undead Vizier or Grim Haruspex, discard them to Mindslicer and return them with Sun Titan to actually finish your opponents off. You can even use Acidic Slime plus Sun Titan to repeatedly destroy and return your own lands for infinite mana and life via High Market. Song of the Dryads allows Acidic Slime to remove Darksteel Forge, Anafenza, the Foremost takes care of Eldrazi titans that would prevent a kill by milling. Even Archetype of Endurance can't protect Platinum Angel from you, since Sun Titan's trigger allows Song of the Dryads to enchant the Archetype, and Acidic Slime can then handle it.

If you happen to draw for example Altar of Dementia, Karmic Guide and Body Double, you just use those three cards to win and never bother with anything else. (Conveniently, that is one of the few combo options that completely gets around creature removal as opposed to the Pattern of Rebirth route, so sometimes you will try to tutor up this specific set of cards.)
There are several more possible loops of creatures in the deck. Altar of Dementia and Goblin Bombardment can convert them into kills, whereas Viscera Seer can set it up for the next turn, Carrion Feeder can kill one player if there are no blockers and Grim Haruspex can find you the card you need for the kill.
All the possible infinite loops Show
 -
- It's important to remember that for some of these loops you don't need to find all the combo pieces yourself, but can make use of one on the opponent's side: Phantasmal Image doesn't care who controls the Reveillark it copies, the combo works just fine. (Body Double and Animate Dead also work on opponent's creatures.)
Even more loops can be achieved with cards like
Crypt Champion
, Swift Warkite, Angel of Glory's Rise, Driver of the Dead, Timely Hordemate, Faceless Butcher, Wormfang Drake or Gift of Immortality, but i consider these worse than the cards i included and don't want to dedicate too many slots to combo pieces.
Necromancy and Dance of the Dead work just like Animate Dead with respect to our combo, but i don't want too much of this kind of effect, so they are not in the deck for now.
There is also a possible loop between Loyal Retainers and Saffi Eriksdotter, but that one requires both participating creatures to be sacrificed to their own abilities (as opposed to all the other loops presented above), meaning that you can't use them to fuel Altar of Dementia or Goblin Bombardment. In order for that loop to be lethal, something like Blood Artist, Altar of the Brood or Genesis Chamber would be required as a win condition, but those cards do close to nothing until you combo off, so they didn't make the cut.

Piloting the Deck
Know all the possible loops and use your tutors to assemble them whenever the chance arises, but play around disruption if you can. Be careful not to lose your sac outlet to removal by playing it too early, avoid having Boonweaver Giant in your hand at inopportune times, and by all means try not to get Reveillark exiled.
This deck is a little slower than some very dedicated combo decks, but more resilient to disruption and more capable to apply disruption itself. So depending on the decks you are facing, you might want to invest an extra turn into getting a hatebear like Spirit of the Labyrinth into play before you proceed to set up the combo.
 Jarad's Orders is a little slow and signals to the whole table what's coming, but it's really good at assembling the combo. You usually put Boonweaver Giant in the grave and get a reanimator creature or sac outlet your in hand.
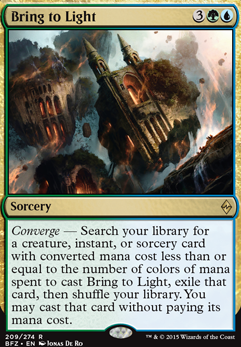 Bring to Light is a very flexible card in this deck and is basically always super powerful. However, most of the time it's correct to get
Academy Rector
, a sac outlet, or the missing card to complete a creature loop. Bring to Light actually casts the card it searches, so remember not to run into problems with your own Eidolon of Rhetoric.
Bring to Light is a very flexible card in this deck and is basically always super powerful. However, most of the time it's correct to get
Academy Rector
, a sac outlet, or the missing card to complete a creature loop. Bring to Light actually casts the card it searches, so remember not to run into problems with your own Eidolon of Rhetoric. Wild Pair can be a little complicated at times, but note that there are several loops involving Karmic Guide that can be assembled just by Wild Pair alone. Generally, knowing which creatures form potential "Wild Pairs" is very helpful. Be aware that effects that change a creature's power or toughness on the board can affect
Wild Pair
(for example Elesh Norn, Grand Cenobite or
Pendelhaven
). It's also an important card to keep track of when making changes to the list.
Wild Pair can be a little complicated at times, but note that there are several loops involving Karmic Guide that can be assembled just by Wild Pair alone. Generally, knowing which creatures form potential "Wild Pairs" is very helpful. Be aware that effects that change a creature's power or toughness on the board can affect
Wild Pair
(for example Elesh Norn, Grand Cenobite or
Pendelhaven
). It's also an important card to keep track of when making changes to the list. If you control Altar of Dementia and it's not yet time to end the game with an infinite loop, you sometimes will have to sacrifice a creature in response to a Swords to Plowshares and need to decide which player to mill for a few cards. It's generally a bad idea to blindly mill opponents as there are all kinds of potential problems like cards with flashback, delve etc. However, milling yourself is perfectly fine, there is basically no card that you can't access just as easily from your grave as from your deck (maybe with the exception of enchantments for
Academy Rector
). Often filling your grave is actively good by helping you assemble a combo faster, but be careful not to make yourself vulnerable to graveyard hate in the process.
If you control Altar of Dementia and it's not yet time to end the game with an infinite loop, you sometimes will have to sacrifice a creature in response to a Swords to Plowshares and need to decide which player to mill for a few cards. It's generally a bad idea to blindly mill opponents as there are all kinds of potential problems like cards with flashback, delve etc. However, milling yourself is perfectly fine, there is basically no card that you can't access just as easily from your grave as from your deck (maybe with the exception of enchantments for
Academy Rector
). Often filling your grave is actively good by helping you assemble a combo faster, but be careful not to make yourself vulnerable to graveyard hate in the process. However, Altar is great at messing with opponents' top-tutors like Enlightened Tutor or Imperial Seal.
 If a second Harmonic Sliver comes into play (for example because you copy it with Phantasmal Image), the second one has the triggered ability twice and gets to destroy two things. That's also true if your opponent is the controller of the second Sliver, so be mindful of that whenever Harmonic Sliver is on the battlefield.
  Saffi Eriksdotter is one of the best combo cards as it's very cheap, combos with several different cards, can start most of these combos while being in the graveyard and protects itself from exile removal like Swords to Plowshares (you just use its ability and it goes to your graveyard, where it's in good position to help you combo later on). In addition to all that, Saffi can generate some nice value in the early turns by using its ability on Sakura-Tribe Elder, an evoked Shriekmaw (the creature is actually in play before its evoke trigger forces it to be sacrificed), Sidisi, Undead Vizier or some other creature that you would like return from the grave for whatever reason.
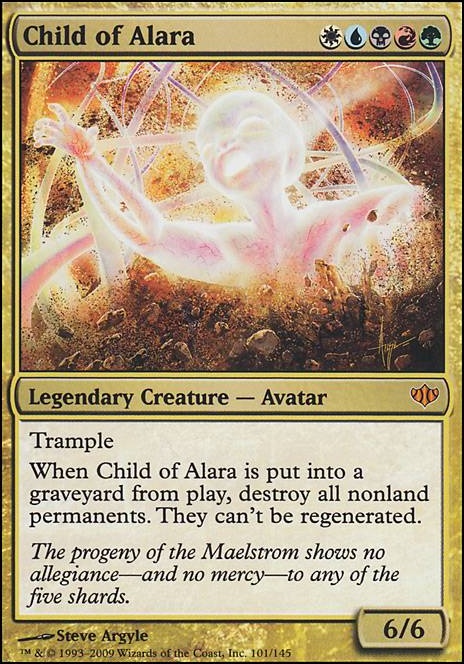
  The commander Child of Alara is mostly a placeholder for this deck, but also a useful safety net. Once it dies, you can choose to either return it to the command zone to avoid its trigger or allow it to go to the grave to blow up the world. If you happen to have Birthing Pod and sac Child to that, you can get Sire Of Insanity (it comes into play after everything else is destroyed) and hopefully leave the opponents with both empty boards and empty hands.
 Naturally, every deck has its weaknesses. The big one for this deck is clearly its mana: Being five colors, something like Blood Moon can shut us down pretty good, but even destroying a single land and a mana dork can disrupt us badly. The mana dorks give us a chance to continue playing after something like Armageddon, but the deck is also very mana hungry. If you expect an effect like that coming, trying to get Birthing Pod into play quickly is one of the best ways to stay in the game, as it operates reasonably well even with very little mana.
  Further, all the available combos involve creatures going into the graveyard and returning from there, so everything that interacts with this will be a problem (Tormod's Crypt, Rest in Peace, Scavenging Ooze, Containment Priest, Mimic Vat, Shred Memory, Memory's Journey). Luckily, most of the combo pieces are interchangeable, so a single piece of the puzzle in exile doesn't spell the end, and the deck has a reasonable repertoire of answers to disruption (Mindslicer, Harmonic Sliver, Song of the Dryads, Swords to Plowshares,
Swan Song
etc).
Further, all the available combos involve creatures going into the graveyard and returning from there, so everything that interacts with this will be a problem (Tormod's Crypt, Rest in Peace, Scavenging Ooze, Containment Priest, Mimic Vat, Shred Memory, Memory's Journey). Luckily, most of the combo pieces are interchangeable, so a single piece of the puzzle in exile doesn't spell the end, and the deck has a reasonable repertoire of answers to disruption (Mindslicer, Harmonic Sliver, Song of the Dryads, Swords to Plowshares,
Swan Song
etc).  Creature removal can be annoying, but is generally only slowing us down, as the redundancy of the deck allows it to play on very well. Some possible creature loops even work through removal (any combination of two out of Reveillark, Body Double and Karmic Guide).
  While removal on our creatures is something we can live with, a well timed Disenchant effect can hurt us. Note that Animate Dead returns the creature it targets with a triggered ability and if it's destroyed in response to that ability, the creature stays in the grave and you don't even get its "enters the battlefield" trigger.
  Countermagic is a little better than removal against us, but this deck has a number of must-counter threats like Birthing Pod and Mindslicer in addition to the combo itself, so it usually requires several counters to really hurt us.
  Static hate effects like Cursed Totem, Torpor Orb,
Humility
, Aven Mindcensor or Elesh Norn, Grand Cenobite can be very tough. The deck has a small number of answers to basically anything and a few tutors to potentially find these answers, but fighting through several of these effects can be a very difficult task. This deck doesn't completely fold to any of these effects - except for the ones that stop it from searching through the library, these are very punishing.
Static hate effects like Cursed Totem, Torpor Orb,
Humility
, Aven Mindcensor or Elesh Norn, Grand Cenobite can be very tough. The deck has a small number of answers to basically anything and a few tutors to potentially find these answers, but fighting through several of these effects can be a very difficult task. This deck doesn't completely fold to any of these effects - except for the ones that stop it from searching through the library, these are very punishing. Effects that exile specific cards directly from our deck like Jester's Cap or Sadistic Sacrament can cripple this deck almost completely if applied correctly. Without the cards Reveillark, Altar of Dementia or Goblin Bombardment you can't reliably convert a creature loop into a kill. Carrion Feeder can grow arbitrarily large and attack, but aside from that you are in big trouble as most of the creatures are too small to apply any real pressure. If those exile effects are relevant in your metagame, you have no choice but to adjust the deck by adding more win conditions or a better midrange backup plan.
Alternatives and Possibilities
As stated above, if Reveillark, Altar of Dementia and Goblin Bombardment are all exiled, this deck will have really big trouble to win the game. So in a metagame where cards like Jester's Cap or Sadistic Sacrament are common, additional win conditions like Blood Artist, Altar of the Brood or Blasting Station might be necessary. Also, be careful if your playgroup runs a lot of cards that shuffle themselves back into their deck when being milled. Anafenza, the Foremost or Animate Dead can handle some of them, but probably it's a good idea to switch Altar of Dementia out for a life total based win condition like Blasting Station in this case.
The current manabase is focused mostly on green, white and black, also supports a few blue cards, but has only a little red mana. It works reasonably well at this point, but adding more blue or red cards should be done with caution.

One way to go is the addition of another combo element that doesnt require the graveyard, for example Linvala, Keeper of Silence, Elesh Norn, Grand Cenobite plus Living Plane . Either of the creatures combines with the enchantment to lock your opponents' lands, which should end the game almost every time. Note that with the exception of Living Plane , those cards are useful disruptive cards on their own.
The combo of Archangel of Thune plus Spike Feeder would also fit the deck, but there is little synergy with the rest of the cards and those two creatures are rather bad on their own. Earthcraft plus Squirrel Nest is another consideration. It operates on a completely different axis than the current deck, making it immune to most of the potential hate, while taking up very little space in the deck.
The other direction would be to play more interactive cards and card advantage engines to improve the deck's potential in games that drag out over a couple of turns. Potential candidates for this are Dark Confidant, Phyrexian Arena, Painful Truths and some of the hatebears presented in the Optional Cards section above. In addition to that, flexible removal spells like Beast Within, Pernicious Deed or Nature's Claim as well as some countermagic should be considered.

Depending on my budget, Survival of the Fittest, Intuition, Phyrexian Tower and Dark Confidant might find their way into the list at some point. I am absolutely convinced that all of them are extremely powerful.
Some of my more far-fetched ideas can be found in the Maybeboard above.
The perfected list would likely include some expensive cards like Imperial Recruiter, Mana Crypt, Three Visits, Imperial Seal and the original dual lands, but at this point those are far out of my reach.
Suggestions
Comments View Archive
Attention! Complete Comment Tutorial! This annoying message will go away once you do!
Important! Formatting tips — Comment Tutorial — markdown syntax
Please login to comment
| Date added | 9 years |
| Last updated | 7 years |
| Legality | This deck is Commander / EDH legal. |
| Rarity (main - side) | 4 - 0 Mythic Rares 58 - 0 Rares 18 - 0 Uncommons 15 - 0 Commons |
| Cards | 100 |
| Avg. CMC | 2.76 |
| Tokens | Morph 2/2 C, Spirit 1/1 C |
| Folders | Pentacolor , EDH Comander , Bookmarked, Decks to View |
| Votes | |
| Ignored suggestions | |
| Shared with | |
| Views |